前言:
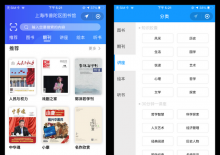
在开辟微信小法式的进程中 微信小法式的底部与顶部默许自带的款式并不能满足平常所需,那末关于自界说顶部与自界说底部的需求也就来了。
1.自界说顶部 navigation
1.1 全局自界说顶部
一切的页面 均利用自界说 顶部,自带顶部全局设置生效 app.json - "window": {
- "backgroundTextStyle": "light",
- "navigationBarBackgroundColor": "#fff",
- "navigationBarTitleText": "Weixin",
- "navigationBarTextStyle": "black",
- //全局自界说顶部
- "navigationStyle": "custom"
- },
- "navigationStyle": "custom"
1.根目录下/components/top-bar 目录中 右键建立 topbar Component组件
2.在父页面 的 json文件中注册 自界说组件- {
- "usingComponents": {
- "top-bar":"/components/top-bar/top-bar"
- },
- "navigationStyle": "custom"
- }
- <!--index.wxml-->
- <view class=&#34;container&#34;>
- <top-bar title=&#34;首页&#34;></top-bar>
- </view>
- // components/top-bar/top-bar.js
- Component({
- /**
- * 组件的属性列表
- */
- properties: {
- title:{
- type:String,
- default:&#39;题目&#39;
- }
- },
- /**
- * 组件的初始数据
- */
- data: {
- topBarHeight:0, //顶部盒子总高度
- },
- /**
- * 组件的方式列表
- */
- methods: {
- getNavHeight(){
- // 获得装备信息
- const sysInfo = wx.getSystemInfoSync();
- // 导航栏总高度 = 状态栏+44px
- const TopBarheight = sysInfo.statusBarHeight+44;
- //异步更新数据
- wx.nextTick(()=>{
- this.setData({
- topBarHeight:TopBarheight,
- })
- })
- }
- },
- created(){
- this.getNavHeight()
- },
- })
- <!--components/top-bar/top-bar.wxml-->
- <view class=&#34;nav&#34; style=&#34;height:{{topBarHeight}}px;padding: {{topBarHeight}}rpx 0 0 0;&#34;>
- <view>
- {{title}}
- </view>
- </view>
- /* components/top-bar/top-bar.wxss */
- .nav{
- box-sizing: border-box;
- background-color: #f1f1f1;
- }
- {
- &#34;usingComponents&#34;: {
- &#34;top-bar&#34;:&#34;/components/top-bar/top-bar&#34;
- },
- &#34;navigationStyle&#34;: &#34;custom&#34;
- }
- <!--index.wxml-->
- <view class=&#34;container&#34;>
- <!-- 顶部组件 -->
- <top-bar title=&#34;公共点评上首页&#34;></top-bar>
- <!-- 内容地区 -->
- <view class=&#34;content&#34; >
- <view wx:for=&#34;{{100}}&#34;>
- {{item}}
- </view>
- </view>
- </view>
- /**index.wxss**/
- .container{
- width: 100vw;
- height: 100vh;
- display: flex;
- flex-direction: column;
- }
- .content{
- flex: 1;
- width: 100%;
- background-color: #f60;
- overflow-y: scroll;
- }

2.自界说底部 TabBar
2.1 全局封闭 默许tabBar 设置,开启自界说tabBar
留意: 需要留意的是,就算开启了自界说 tabBar 设置,照旧需要保存全局的 tabBar 的list 设置【这样做是为了 可以经过 wx.switchTab() 方式可以跳转到 该页面,该页面照旧为 tabBar 】 - &#34;tabBar&#34;: {
- &#34;custom&#34;: true, //开启自界说tabBar 默许tabBar 款式生效
- &#34;color&#34;: &#34;#d4d4d2&#34;,
- &#34;selectedColor&#34;: &#34;#e26c4f&#34;,
- &#34;borderStyle&#34;: &#34;white&#34;,
- &#34;list&#34;: [
- {
- &#34;pagePath&#34;: &#34;pages/index/index&#34;,
- &#34;text&#34;: &#34;首页&#34;,
- &#34;iconPath&#34;: &#34;/images/index.png&#34;,
- &#34;selectedIconPath&#34;: &#34;/images/index_active.png&#34;
- },
- {
- &#34;pagePath&#34;: &#34;pages/add/add&#34;,
- &#34;text&#34;: &#34;公布&#34;,
- &#34;isCenter&#34;:true, //这里是为了表白该子项 是显现在中心的圆里面
- &#34;iconPath&#34;: &#34;/images/add.png&#34;,
- &#34;selectedIconPath&#34;: &#34;/images/add.png&#34;
- },
- {
- &#34;pagePath&#34;: &#34;pages/discount/discount&#34;,
- &#34;text&#34;: &#34;找优惠&#34;,
- &#34;iconPath&#34;: &#34;/images/discount.png&#34;,
- &#34;selectedIconPath&#34;: &#34;/images/discount_active.png&#34;
- },
- {
- &#34;pagePath&#34;: &#34;pages/shop/shop&#34;,
- &#34;text&#34;: &#34;找好店&#34;,
- &#34;iconPath&#34;: &#34;/images/shop.png&#34;,
- &#34;selectedIconPath&#34;: &#34;/images/shop_active.png&#34;
- },
- {
- &#34;pagePath&#34;: &#34;pages/mine/mine&#34;,
- &#34;text&#34;: &#34;我的&#34;,
- &#34;iconPath&#34;: &#34;/images/mine.png&#34;,
- &#34;selectedIconPath&#34;: &#34;/images/mine_active.png&#34;
- }
- ]
- }
- <!--components/tab-bar/tab-bar.wxml-->
- <view class=&#34;bar&#34;>
- <block wx:for=&#34;{{tabbar.list}}&#34; wx:key=&#34;index&#34;>
- <!-- 假如是中心的 -->
- <block wx:if=&#34;{{item.isCenter}}&#34;>
- <view class=&#34;center&#34; style=&#34;background: {{tabbar.selectedColor}};&#34; data-page=&#34;{{item.pagePath}}&#34; bindtap=&#34;toPage&#34;>
- <image class=&#34;add-icon&#34; src=&#34;{{item.iconPath}}&#34; mode=&#34;&#34; />
- </view>
- </block>
- <!-- 假如不是中心的 处置 -->
- <block wx:else>
- <!-- 假如不选中 -->
- <view wx:if=&#34;{{index!=active}}&#34; bindtap=&#34;toPage&#34; data-page=&#34;{{item.pagePath}}&#34; class=&#34;item&#34; style=&#34;color:{{tabbar.color}}&#34;>
- <image class=&#34;icon&#34; src=&#34;{{item.iconPath}}&#34;></image>
- <view>
- {{item.text}}
- </view>
- </view>
- <!-- 假如选中 -->
- <view wx:else class=&#34;item&#34; bindtap=&#34;toPage&#34; data-page=&#34;{{item.pagePath}}&#34; style=&#34;color:{{tabbar.selectedColor}}&#34;>
- <image class=&#34;icon&#34; src=&#34;{{item.selectedIconPath}}&#34;></image>
- <view>
- {{item.text}}
- </view>
- </view>
- </block>
- </block>
- </view>
这里的data 里面设备了一个默许数据 tabBar 就是间接复制 的 app.json 里面的 tabBar 设置的 json工具 - // components/tab-bar/tab-bar.js
- Component({
- /**
- * 组件的属性列表
- */
- properties: {
- //当前选中的是哪个tabBar
- active:{
- type:Number,
- default:0,
- }
- },
- /**
- * 组件的初始数据
- */
- data: {
- tabbar:{
- &#34;color&#34;: &#34;#d4d4d2&#34;,
- &#34;selectedColor&#34;: &#34;#e26c4f&#34;,
- &#34;borderStyle&#34;: &#34;white&#34;,
- &#34;list&#34;: [
- {
- &#34;pagePath&#34;: &#34;pages/index/index&#34;,
- &#34;text&#34;:&#34;首页&#34;,
- &#34;iconPath&#34;: &#34;/images/index.png&#34;,
- &#34;selectedIconPath&#34;: &#34;/images/index_active.png&#34;
- },
- {
- &#34;pagePath&#34;: &#34;pages/discount/discount&#34;,
- &#34;text&#34;:&#34;找优惠&#34;,
- &#34;iconPath&#34;: &#34;/images/discount.png&#34;,
- &#34;selectedIconPath&#34;: &#34;/images/discount_active.png&#34;
- },
- {
- &#34;pagePath&#34;: &#34;pages/add/add&#34;,
- &#34;text&#34;: &#34;公布&#34;,
- &#34;isCenter&#34;:true,
- &#34;iconPath&#34;: &#34;/images/add.png&#34;,
- &#34;selectedIconPath&#34;: &#34;/images/add.png&#34;
- },
- {
- &#34;pagePath&#34;: &#34;pages/shop/shop&#34;,
- &#34;text&#34;:&#34;找好店&#34;,
- &#34;iconPath&#34;: &#34;/images/shop.png&#34;,
- &#34;selectedIconPath&#34;: &#34;/images/shop_active.png&#34;
- },
- {
- &#34;pagePath&#34;: &#34;pages/mine/mine&#34;,
- &#34;text&#34;:&#34;我的&#34;,
- &#34;iconPath&#34;: &#34;/images/mine.png&#34;,
- &#34;selectedIconPath&#34;: &#34;/images/mine_active.png&#34;
- }
- ]
- }
- },
- /**
- * 组件的方式列表
- */
- methods: {
- //跳转页面
- toPage(event){
- wx.switchTab({
- url: &#39;/&#39;+event.currentTarget.dataset.page
- })
- }
- }
- })
- /* components/tab-bar/tab-bar.wxss */
- .bar{
- width: 100%;
- height: 50px;
- background: #fff;
- position: fixed;
- bottom: 0;
- display: flex;
- justify-content: space-around;
- border-top: 1px solid #eee;
- }
- .item{
- flex: 1;
- height: 50px;
- display: flex;
- flex-direction: column;
- justify-content: center;
- align-items: center;
- font-size: 14px;
- }
- .icon{
- width: 25px;
- height: 25px;
- }
- .center{
- position: relative;
- top: -20px;
- width: 50px;
- height: 50px;
- text-align: center;
- line-height: 50px;
- border-radius: 50%;
- color: #fff;
- }
- .add-icon{
- margin:12.5px;
- width: 25px;
- height: 25px;
- }
页面.json - {
- &#34;usingComponents&#34;: {
- &#34;top-bar&#34;:&#34;/components/top-bar/top-bar&#34;,
- &#34;tab-bar&#34;:&#34;/components/tab-bar/tab-bar&#34;
- }
- }
- <!--index.wxml-->
- <view class=&#34;container&#34;>
- <!-- 顶部组件 -->
- <top-bar title=&#34;公共点评上首页&#34;></top-bar>
- <!-- 内容地区 -->
- <view class=&#34;content&#34; >
- <!-- <view wx:for=&#34;{{100}}&#34;>
- {{item}}
- </view> -->
- </view>
- </view>
- <!-- 自界说底部 tabBar 2:暗示当前第几个被选中 进入这个页面时,需要选中的数组索引 -->
- <tab-bar active=&#34;2&#34;></tab-bar>
- /**index.wxss**/
- .container{
- width: 100vw;
- height: 100vh;
- display: flex;
- flex-direction: column;
- }
- .content{
- flex: 1;
- width: 100%;
- background-color: #f60;
- overflow-y: scroll;
- padding-bottom: 50px;
- }

3.外联款式的导入
操纵@import “导入的款式文件相对途径” 可以导入公共的外联款式 - @import &#34;../../common/common.wxss&#34;;
官网文档链接: https://wechat-miniprogram.github.io/weui/docs/quickstart.html
小法式支持利用npm安装第三方包,要求开辟者工具>=1.02,根本库版本>=2.2.1- npm i weui-miniprogram
- 或
- yarn add weui-miniprogram
- /**app.wxss**/
- @import &#34;./miniprogram_npm/weui-miniprogram/weui-wxss/dist/style/weui.wxss&#34;;

- 处理计划: 封闭依靠项检测提醒,并重启项目 project.config.json
- &#34;setting&#34;: {
- &#34;ignoreDevUnusedFiles&#34;: false,
- &#34;ignoreUploadUnusedFiles&#34;: false,
- }
- {
- &#34;usingComponents&#34;: {
- &#34;mp-dialog&#34;: &#34;weui-miniprogram/dialog/dialog&#34;
- }
- }
- <mp-dialog title=&#34;test&#34; show=&#34;{{true}}&#34; bindbuttontap=&#34;tapDialogButton&#34; buttons=&#34;{{buttons}}&#34;>
- <view>test content</view>
- </mp-dialog>
- Page({
- data: {
- buttons: [{text: &#39;取消&#39;}, {text: &#39;确认&#39;}]
- }
- }
|


 微信扫一扫
微信扫一扫

 匿名
发表于 2023-3-10 08:50:56
匿名
发表于 2023-3-10 08:50:56